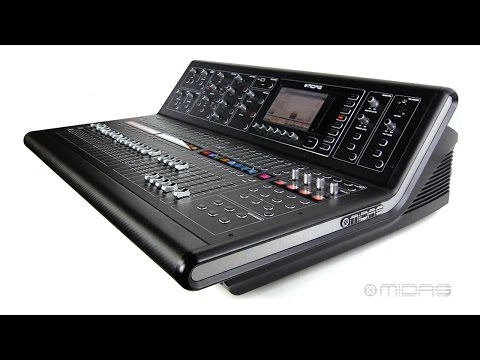
MIDAS M32 Digital Console:
In this video we show you the M32, a Digital Console for Live and Studio with 40 Input Channels, 32 MIDAS Microphone Preamplifiers and 25 Mix Buses.
Video Text:
0:00:00.6 –>
this is a training on how to find your way around the m30 – occasionally there are more options for each encoder you can access these extra options by pressing the down arrow key on each screen there are multiple tabs which are accessed by pressing the right and left arrow keys on this homepage we can see a general overview of what is going on for the channel the conflict page is where we can select a source and adjust the insert settings for the channel next is the gate and dynamic tabs which are just expanded detailed views of the gate and dynamics off the console we also have an expanded view of our EQ section as well as our bus sends section the last tab is a view of our main buses both left and right which reflect the panning of the channel the metres button on the right side of the screen is a very useful
0:01:02. –>
troubleshooting button the first tab is the channel pre-fade level then we have our mix bus tab our auxilary / effects tab and our in / out analog in / out and finally a RTA tab where we can select any channel on the console and see its RTA graph the next button routing is covered rather extensively in another video that I’ve created moving on to the setup button this is a very important section as many of the settings in these tabs do not recall with the scenes on our global tab you can see that we can reset the console update firmware and make initializations on the console the config tab our more settings which do not recall with the scenes the next tab remote is for dog control or if you’re trying to do midi triggering through the console the
0:02:01.3 –>
networking tab which is used to control the console from a computer or iPad is covered in another one of my training videos scribble strip is where we can make naming assignments to each individual channel the preamps tab is where we can make adjustments to any preamp that’s connected to the console finally we have the card tab where you can assign settings for the card that you have connected to the console the next button on the right of the screen is library where presets are stored for channels effects and routing the next button is our effects this is where all eight effects engines can be edited inserted and assigned to channels or busses you can edit effects engines by using the sixth encoder or by using the arrow keys and clicking through the tabs the next two buttons can be used on any page on any screen the first is for mute groups
0:03:01. –>
when mute groups is enabled the buttons on the console surface for muting become a sign so to assign channels to any mute you hold down the console surface button and press select on any channel you want to be a part of that group the mutes are then assigned to the encoders underneath the screen be sure to unable the mute group or your surface buttons will be inactive the utility button gives you access to common utility controls such as delete copy and paste it also gives you easy access to library presets these presets which you’re seeing now are the same presets that are stored in the library button under the effects tab those are all the views for the buttons on the right side of the screen we also have the recorder view which includes a home where you can start and stop recordings and a configuration for the signal routing the monitor View button brings you to this window which is where
0:04:01.5 –>
you configure the monitor or headphone output the talkback View button brings you to talkback a and you can also tab over to talkback B as well as the oscillator which is covered in another training we also have the View button under show control which is covered extensively in another training as well finally the last view which is not included on the right side of the screen is the customizable user controls you have three different pages of user controls which is configured from this window thank you for watching this getting started view on the m32
