

The mountain dulcimer, with its gentle curves and inviting strings, is an instrument that captivates hearts and ignites musical journeys. But for new players, the fretboard can seem like an intimidating landscape. Worry not, aspiring dulcimerists! This guide will illuminate the fundamentals of finger positions, equipping you to navigate the fretboard with confidence and unlock the melodies within.
Finger Positions on Mountain Dulcimer
Understanding the Dulcimer Fretboard:
The mountain dulcimer typically features three to four frets, with additional drone strings that resonate continuously. The melody strings are numbered from the nut (the top end of the fretboard) down towards the soundhole. String 1 is closest to the player, and the numbering increases as you move away.
The Art of Fretting:
Fretting simply means pressing a finger down onto a string behind a fret to shorten its vibrating length, thereby changing the pitch of the note. For clear and resonant tones, use the fleshy tips of your fingers, not the pads. Develop calluses over time, as these will protect your fingertips during practice.
Starting Simple: Open Strings and First Fret
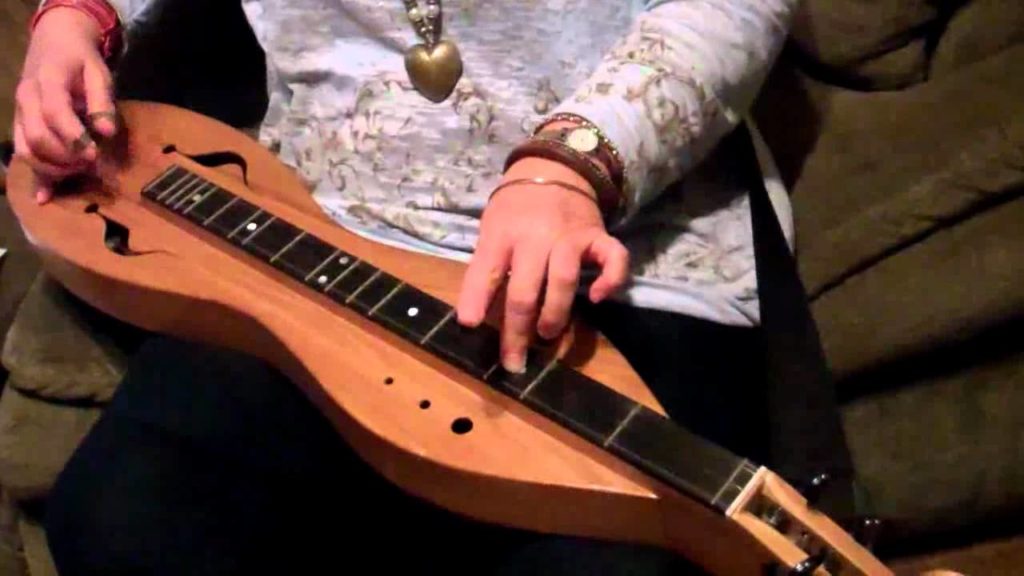
Your initial explorations will likely begin with open strings, where no fingers touch the fretboard. Strumming all four strings open creates a bright, harmonious sound. Once comfortable with open strings, venture into the first fret. Place your index finger on string 1 (closest to you) behind the first fret. This creates a note one whole step higher than the open string. Experiment with fretting different strings on the first fret to get a feel for the changing pitches.
Moving Up the Fretboard: Chord Shapes
The mountain dulcimer thrives on chords, combinations of notes played together to create a specific sound. Mastering basic chord shapes unlocks a world of melodies and songs. A common starting point is the C major chord. Here’s how to play it:
- Place your index finger on string 3, behind the first fret.
- Place your middle finger on string 1, behind the second fret.
- Strum all four strings.
This creates a C major chord, a foundational building block for many songs. As you progress, explore other chord shapes, experimenting with finger placement on different strings and frets. Remember, there are often multiple ways to finger a chord, so find what feels most comfortable for your hand.
Economy of Motion: Efficiency is Key
As you learn more chords and finger positions, strive for economy of motion. This means using minimal finger movement to transition between chords. For example, if you’re playing a C major chord and want to move to a G major chord, keep your index finger on string 3 (first fret) and simply move your middle finger up to string 2 (third fret). This minimizes finger travel and creates smoother transitions.
Developing Technique and Comfort:
Remember, mastering finger positions takes time and practice. Here are some tips to accelerate your learning and ensure proper technique:
- Start slow and focus on accuracy. Ensure your fingers are placed correctly behind the frets for clear notes. Speed will come naturally with practice.
- Practice finger independence. Exercises that isolate finger movement can improve dexterity and coordination.
- Pay attention to posture. Sit comfortably with the dulcimer resting on your lap or supported by a strap. Maintain good posture to avoid strain and fatigue.
- Most importantly, have fun! The joy of music is paramount. Experiment, explore different songs, and celebrate your musical journey.
With dedication and these essential finger positioning principles, you’ll soon be confidently navigating the dulcimer fretboard, transforming it from an intimidating landscape to a playground of melody and musical expression. So, pick up your dulcimer, explore finger positions, and unlock the melodies waiting to be discovered!
Bonus Video
In this video from Banjo Lemonade we show you everything you need to know about the correct finger positions when playing the mountain dulcimer, including how to use economy of motion while playing. great for beginners.
Get started with our free Dulcimer Tabs resource, and article on how to read dulcimer tabs
Video Text:
0:00:00.1 –>
hey everybody I hope you’re doing well today all right I’ve got a fun video for us today um this will go along with my beginner series I’m going to go through some tablature and I’ll be putting it up on screen for you so you can see exactly what I’m talking about okay and I’m going to be going through the tablature and showing you how to use your fingers on the fingerboard okay and how to get the most out of them and um one thing that kind of sort of throws people for a loop when they get started is where in the heck do I put my fingers so that’s what we’re going to be working on so I’m going to take the camera and move it and I’m going to talk to you and walk you through it okay all right here we go so the first thing we always want to do is we want to check our tuning and I find that my tuning will be greatly off because [Music] my back room
0:01:01.1 –>
will be a lot colder than my front room because we have a wood stove out here so when I bring it out here it will uh when I bring it out into this warmer area it’ll usually be a lot higher everything all my strings will be higher okay so now we are in tune okay all right so let’s put the uh I’m gonna put the graphic up of the tablature that we’ll be using here and this is owed to Joy arranged by Ron Zuckerman okay and I’ll leave the link below for you to go get this tab if you’d like to play it [Music] all right so if you haven’t already make sure you watch my how to read tablature video I’ll put it at the top if you haven’t already seen it but um you want to do that before you do this as you can see here this is all chords
0:02:01.7 –>
there’s not individual notes so that means we’re going to be having to use our use our fingers so for the first one um we’re just putting one finger down at the second fret that’s pretty easy you can use your index finger or your thumb to do that now see the thumb here is very important we use the thumb to make these big long stretches on our fingerboard okay and uh so it’s going to feel weird but you need to just go ahead and start practicing it and getting used to it you may find that you need to move your dulcimer away from you more or adjust it in some way as well when you’re doing this but go ahead and put your hand down onto the fingerboard and you’ll see just naturally if you just spread your hand out without spreading it out far that you’ve already got with your pinky to your thumb I’ve got
0:03:00.1 –>
the first four Frets covered now see I have a a long vibrating string length on this your dulcimer may have a shorter vibrating string length which would mean these Frets will be a little closer together but anyway okay so we’ve got those first two notes there the first two chords plate with either that index or any finger or thumb and when one we want when we use our thumb we just want to use that meaty part here and it may press into your nail bed a little bit and it may cause some irritation at first you want to try to adjust that and move it but until you build up a little callus there may cause a little bit of irritation one thing you can do if you’d like is you can remove one of your strings you usually have two Melody strings nowadays not always but if you just take one off of there that’ll give a little relief to your thumb until you get used to it if you
0:04:00.7 –>
want to do that okay all right so the next thing we come to it says zero for that bass string one for the middle string and three for our Melody string okay now you can do this a number of ways you could do middle finger thumb middle finger index finger see how I’m having to change the angle of my wrist there to get that you could do uh index finger thumb pinky thumb you know there’s a whole bunch of different things you can do based on what you need to do if you have any limited use of fingers you can use different ones okay so I like to use my middle and my thumb for that and what that’ll do is get me ready for the next chord okay so I’ve got that there [Music] and one thing you might want to consider too is I started out here on the second
0:05:01.8 –>
fret and I just moved one up and added that middle finger [Music] now do you see how how that was an easier move for me than this here okay I have videos on Banjo tons of them about this it’s called economy of motion so we want to use our fingers and our fretboard to our advantage and naturally when we just put our hand down our thumb is already way up here at the fourth fret so we want to use that so if we just did like that that’s a lot easier move now we look at the next one the next one says two three four going down from base middle to Melody so if we just slide it one more time slide that thumb again this time we put our index finger down at that three and
0:06:01.3 –>
our middle moves up to that base string and plays that chord see how we just we just moved our thumb up [Music] that is a great use of your economy of motion there without without doing all these other movements okay [Music] and it’s just a slide up okay so now let’s look at the next measure the next measure starts right here and then look we’re going to move back down to that zero one three so we just slide it back look what’s already there we just lift that index finger it’s already spaced perfectly and then back to two then we have a 101 chord now again there’s a bunch of different ways you could do this 101. you could use your thumb and do this
0:07:00.9 –>
that is the least best way to do it in my opinion look how far away my hand is from my entire fretboard okay it’s way back here okay you can do that it’ll work it’ll make the same noise but it’s not good for your economy of motion so since we’re using our thumb a lot to get all these cords I recommend you just take we went from here now we want the 101 you can either take your middle and ring and go down or you could take your index ring index middle either one any of those are good because your thumb is still back here in case you need to do any quick things okay so let me play through those first two measures for you and I want you to keep an eye on my hand and how I’m using my economy of motion here all right [Music]
0:08:02.5 –>
see how I’m not making huge movements I’m not having to twist my wrist or anything uh let’s go on to that third measure the third measure is two opens a chord again 101 second fret okay I’m gonna play through those first four measures for you okay and just keep an eye again on that economy of motion one other thing I want to mention about this is your fingers that you’re not using keep them in place and ready to go so if I’m over here using my thumb or my index finger and I
0:09:01.9 –>
know I need to do a chord let’s say the a chord 101 next I’m not going to have my hand like this to do this I’m I’m already thinking in my head where I’m going next so I see that my next thing is that 101 that a chord so I’ve already got my hand ready and it’s it’s just hovering over the strings see there so that is how we want to use our economy of motion now um I’m going to get rid of the graphic now because I’m going to show you some other chords and things um you know lots of good chords take this L shape which would be open open two on the first fret okay well not on the first fret the first the first position would be open open two okay the next position would be one one three there’s a two fret Gap
0:10:04.3 –>
foreign [Music] okay and then when we get up here to our six plus it’s a little bit different but my point here is that this can be played a number of ways you could play that one one three uh where you bar the one and put your thumb down at the three [Music] that’s kind of a quick thing so you can use the bar to your advantage where you press all four strings down but again you want to think about the economy of motion there and you want to think about what’s coming next if I’m barring right here and I need to come up here higher next look what’s over here ready to go I can use that bar chord
0:11:02.1 –>
and go to the next fret and the next fret even or I could have pressed all the strings down with my fingers instead and use my thumb that away uh I could have also instead of doing the bar on the index I like to do a bar on my ring and then I’ve got look at all these fingers out here I’ve got other fingers and I can even stretch it farther um so we just want to think about these things I’m going to move the camera back up and we’ll talk a little bit more I hope you found value in that video I hope that it helped you to understand a little bit more about how your finger placement is very important on any instrument you play and we want to use that economy of motion to make it easier on ourselves right you
0:12:01.9 –>
know jumping from here to here is hard enough when uh we’re trying to make those stretches without using sort of I don’t want to say the wrong uh movements but movements that are you know harder more difficult let’s make this easier on ourselves and make it more comfortable and one thing that I was showing you a little bit of on the video is that you may need to adjust where the dulcimer is in your lap um if you’ll a lot of times what you need to do you might get some wrist pain and such a lot of times what you need to do is just take the head of it and move it farther away from your body the bottom end of it will stay close to your body but take that head end of it move it out farther and that just it just creates more space for you to get in there with your hand and and your wrist and everything so um yeah I hope you enjoyed that got something out of it
0:13:00.8 –>
and uh before I go I just want you to always remember that Jesus loves you
Popular Posts:
Stylophone Tabs
Banjo Tabs
Dulcimer Tabs
Kalimba Tabs
Mandolin Tabs
Hydrophones