

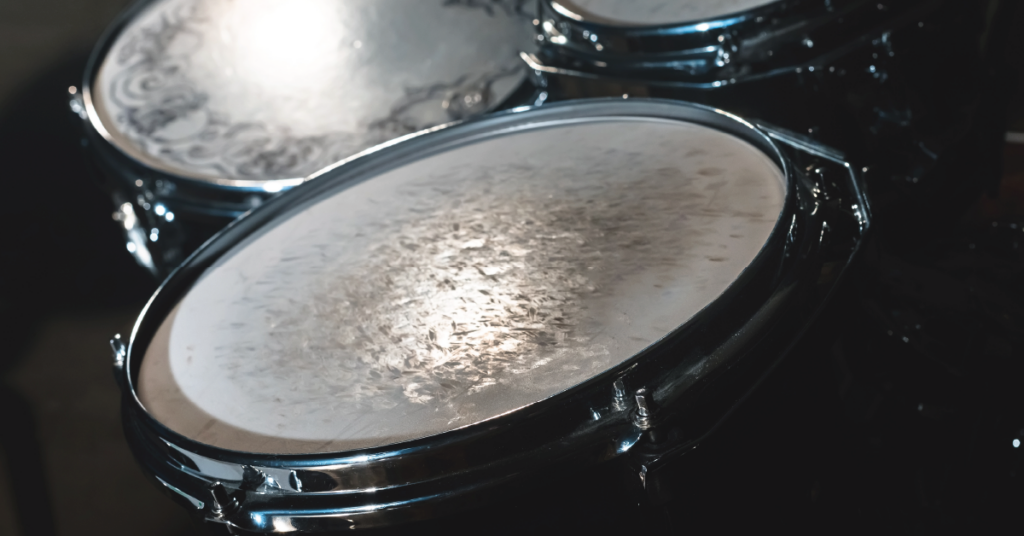
Used drum heads don’t have to spell disaster for your sound. With a little extra effort and know-how, you can still achieve decent tuning and keep your drumming experience fulfilling. Here’s a guide to navigating the world of used drum heads and getting them to sing (or rather, boom and crack!) again:
How to Tune Drums with Used Heads
Preparation is Key:
- Cleanliness Counts: Before attempting to tune, remove any dust, dirt, or debris from the drum head and the drum shell’s bearing edge using a damp cloth. Dirt can hinder proper tuning and affect sound quality.
- Warm Up Those Heads: Used heads might be a bit stiffer than new ones. Briefly warm them up by playing them gently or using a heat gun (on a low setting and from a safe distance) to make them more pliable and easier to tune.
The Tuning Process:
- Cross-Tuning Technique: This is the golden rule of drum tuning, regardless of head age. Tighten each lug (tension rod) by small increments, moving in a star pattern around the drum. This ensures even tension across the entire head.
- Start Lower, Aim Higher: Used heads might have a lower tuning range than new ones. Begin by tuning each lug to a relatively low pitch, then gradually increase tension evenly until you achieve the desired sound. Aim for a balance between resonance and tightness.
- Listen for the Sweet Spot: As you tighten the lugs, tap the center of the head and listen for the pitch. You want a clear, focused sound, not a dull thud or a choked ring. Used heads might have a slightly shorter tonal range, so adjust your expectations accordingly.
- Muffling Can Be Your Friend: For used heads that struggle to maintain a clear tone, strategically placed dampening materials like gels or rings can help control overtones and ringing. Experiment with placement to find the sweet spot.
Realistic Expectations:
- Used Doesn’t Mean Bad: While tuning used heads might require more effort, it’s definitely achievable. With patience and a good ear, you can still get a decent sound that allows you to practice and express yourself musically.
- New Heads for New Beginnings: If used heads present a constant tuning battle, consider replacing them with new ones. Fresh heads offer a wider tuning range, better projection, and a more vibrant sound.
Conclusion:
Tuning used drum heads requires a bit more finesse, but with the right approach, you can coax out a good sound and extend the life of your drumming gear. Remember, consistent practice and a bit of ingenuity can keep your drumming journey rhythmic and rewarding, even with used heads.
Bonus Video
In this video, Adrian Griffin shows us how to quickly tune toms for metal, punk, hardcore or rock. Adrian runs “Ace Drum Audio” and plays in Australian bands Lo! and Burial Pit (and has previously played with 28 Days, Lord, Sumeru, Truth Corroded, Gvrlls, Daemon Pyre, Tom Ugly, Hell City Glamours)
Adrian Griffin exclusively uses Remo Drum Skins
Video Text:
0:00:00.4 –>
this is how i tune toms first of all i take off all the skins give the drum a good clean out put them back on and then making sure i line up the badge with the badge on the drum then go around and finger tighten each tension rod on opposite sides then start with about a quarter to a half turn on each one you don’t want to go too high otherwise your timer will be really ringy unless you’re playing jazz or something tap gently around the edge about an inch from each one just to get the same pitch [Music] you only need the slightest adjustments then the top same thing badge lined up with the badge on the drum finger tighten all the way around and just a slight quarter to half a turn to start off with on opposite sides
0:01:01.4 –>
tap around the edge [Music] i’d like to go just just off where it’s sounding a bit not quite tight enough [Music] it’s going to be too high [Music] this takes a bit of trial and error getting at the same pitch you might have to go down to get some of the higher ones a bit lower but you want to go down wind past and then come back up [Music]
0:02:08.3 –>
so they’re about the same on top and bottom let’s give that a hit [Music] now i put a microphone on there just to show you the difference [Music] tuning always comes down to personal preference and depending on what style of music you’re playing but for metal rock punk uh heavier styles of music i like to go for it slightly on the lower end but still with enough punch so that it’s going to cut through if you’re playing jazz or other different styles of music you might want to tune up a bit higher i find the higher you tune the more
0:03:00. –>
overtones and ring you’re going to get from a drum which can be what you want sometimes but if you want a solid punchy sound for metal and heavier styles of music i find finger tight then come up a bit from there make sure everything’s in tune with itself maybe on a 10 inch tom you might go a little bit higher eight inch time higher again and then as you go down in size in terms of down in pitch but bigger in size um say for a floor tom i would have both top and bottom skins finger tight and then just a little bit above just to get the wrinkles out of the skin but tight enough so you’ve got a tone but it wouldn’t be as tight as say a 10 inch tom so then you want to have sort of even note spacing between each tom and it’s definitely a lot of trial and error in getting to know your drums and what pitch works for each drum size and shell material the type of room you’re in all of that kind of stuff but
0:04:01.1 –>
as a starting point with a 12 inch tom that’s how i do it as far as choosing what heads to use i go for remo empra clear on the top and remo ambassador clear on the bottom i sometimes use coated heads on the top if i’m looking for a slightly deader sound but i find that clear heads just have a bit more attack so you can hear every hit a bit more clearly you can try single ply heads on the top but you’re generally going to get more overtones and a more ringy open sound which is maybe more desirable for i don’t know maybe jazz or pop music or something like that but for metal and rock and hardcore and punk and heavier styles of music the thicker the better i think just i mean and that’s personal preference as well i like to have a fat sounding tom sound um and the combination of a two ply head on top and a single ply on the bottom
0:05:00.6 –>
works really well for me and for a lot of people should also mention that these skins aren’t brand new the kit has done two full days of recording before that they were brand new skins but they’re still in good condition they’re worn in they still sound good if the skins have been used too much you might have divots around the middle section where no matter how much you tune around the edge the skin in the middle is still flapping around that’s when you definitely want to try and change them but you might be at a gig using a borrowed kit or a rental kit that doesn’t have new skins or has been played a lot before so it’s still a good idea to learn how to get the most out of what you’re working with i guess it’s not always going to be possible to have brand new skins so i think uh just working with what you have at the time is a good idea and whenever you can get new skins especially for a recording i would recommend that for sure
0:06:01.6 –>
the bottom skins on this drum kit are actually the original remo ambassadors that came with the kit and they’re fine they don’t get hit so the chances of them wearing out is much less because they’re also under much less tension than say a snare drum i would definitely replace the bottom snare drum skin more regularly but i think it’s a good idea to get familiar with tuning up all different types of drums just if you’re at a gig and the toms aren’t sounding right you can just go around and tap around make sure the pitch is the same just always have a drum key with you and just get familiar with tuning different drums in different situations with different quality heads and you’ll be good